Making an analogue record
A rough guide to what you'll need to get started.

I’ve just finished my first all analogue record. That means recording, mixing, and mastering using only analogue methods and mediums. Essentially for me it meant recording to tape, mixing to tape, and mastering straight to vinyl.
I had very little idea what I was doing when I decided to make an all analogue record. I’m still unsure about a lot of things, but I imagine there are a lot of artists in my position who might like to give this sort of thing a go but don’t know where to get started. And perhaps there are some of you who are just interested in what this process looks like. So this is a rough guide to what you’ll need:
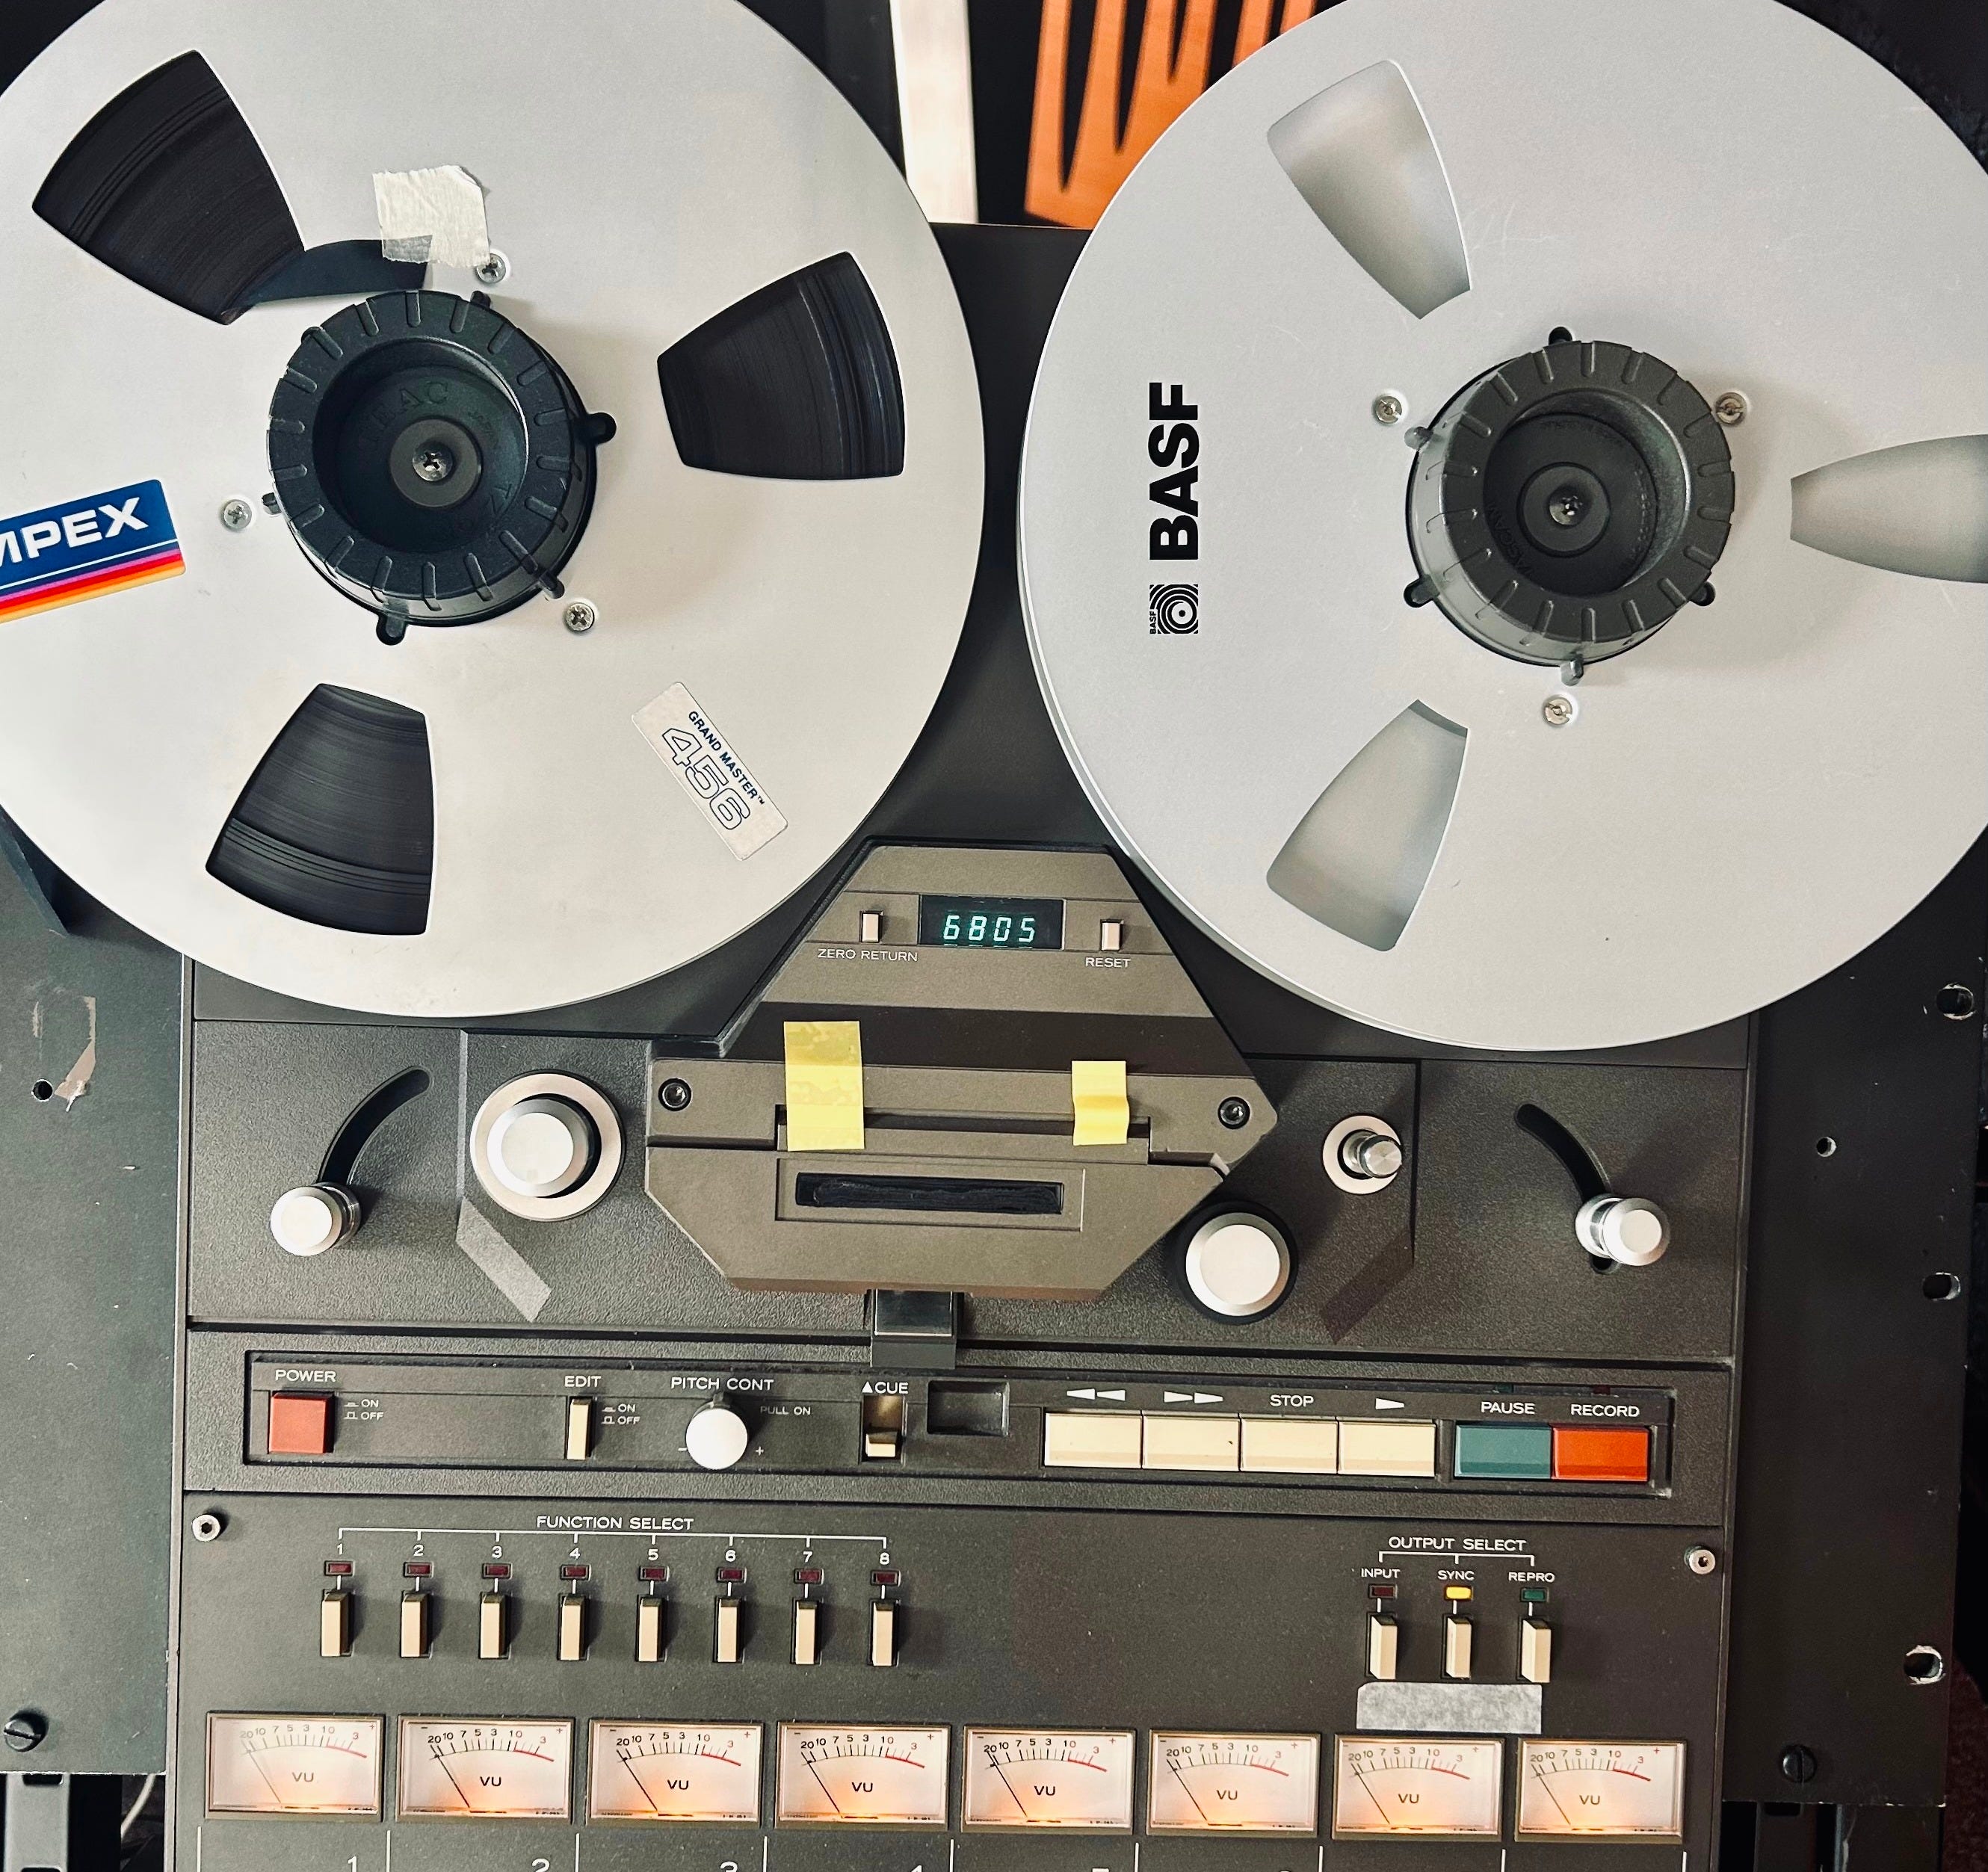
A multitrack reel-to-reel tape machine.
Analogue records start off with recording to tape. These tape machines or “reel-to-reels” come in various shapes and sizes ranging from 2-tracks (a stereo recorder), to 24 tracks. The size of the reel-to-reel tapes also ranges from ¼ inch to 2 inches, depending on how many tracks you want to record and how high a quality you want to record to.
Some tape machines also operate by cassette, and have a wonderful lo-fi quality to them… Bruce Springsteen’s Nebraska was recorded to a TEAC Tascam Series 144 4-track cassette recorder. Elliott Smith recorded Roman Candle to its successor, the Series 244.


For my album ‘Trouble Times’ I went for a TASCAM 38 8-track reel-to-reel (built between 1984-1989). Easy enough to find second hand at online shops like Marktplaats in the Netherlands for around 750-1000 Euros. One of my favourite records, Elliott Smith ‘Either/Or’ was partly recorded on a TASCAM 38. There are plenty of them around, which is also handy for finding spare parts, and a few people who still run repairs on TASCAM equipment.
Of course there are many other options, the Otari MX5050 is another great option - (Adrianne Lenker recorded ‘Songs’ on one of these) but they’re much harder to find and more expensive.
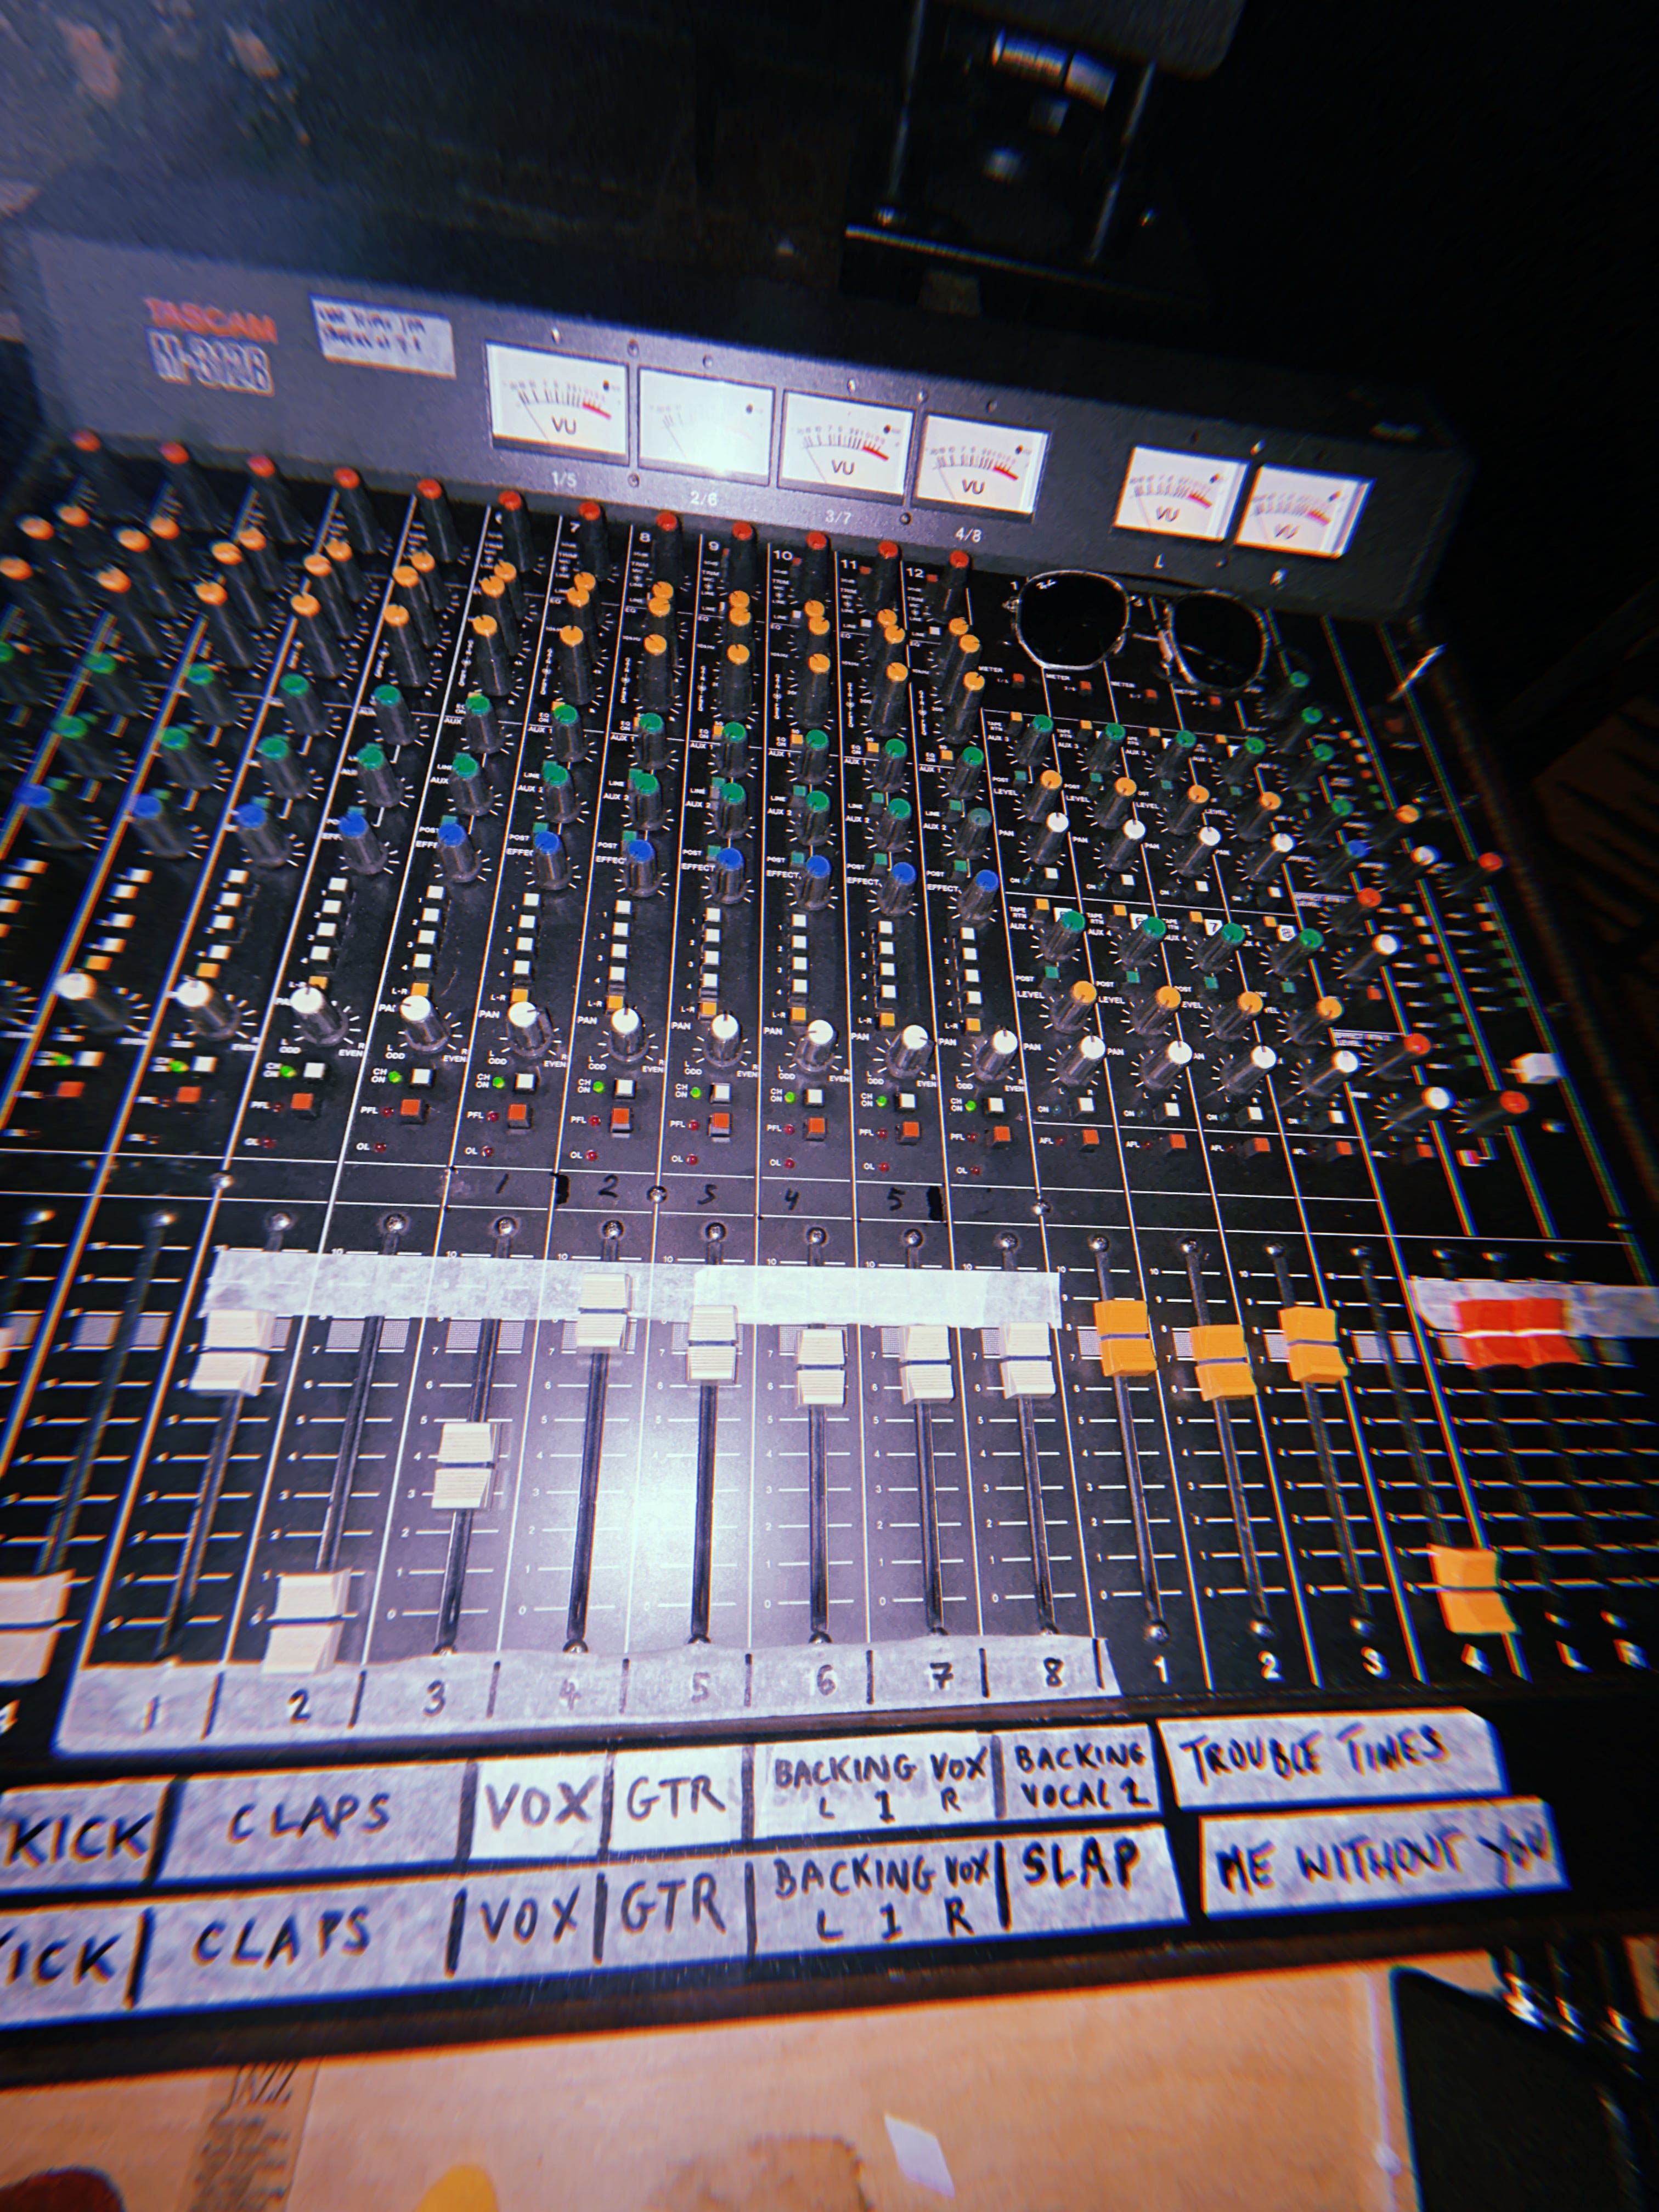
A mixing board
The mixing board has 2 functions - to take your inputs (microphones, drum machines etc) and send them to your tape machine, and also to playback & mix what you’ve just recorded on your tape machine. I went full TASCAM on this record, and found a TASCAM 312B (built between 1987-1994). It’s a 12 channel mixer, with a lovely built in EQ. The advantage of having 12 channels with an 8-track reel-to-reel is you can split the board to use 4 channels for inputs, and the other 8 channels always available for playback. You can find these for around 400-500 Euros second hand.
A stereo reel-to-reel
Once you’ve recorded all your tracks to your multitrack reel-to-reel, you’re ready to mix these 8 tracks down to 2 tracks of left and right audio. There are some beautiful and very expensive machines out there such as the Studer A80RC and Ampex ATR100, but probably a bit of an unnecessary purchase depending on how hi-fi you want your lo-fi sound to be. I opted for a Revox B77 initially. They come in various formats - I’d recommend looking for the MK II version that can do pitch/speed adjustment, it’s a neat feature… but these units cost around 900 Euros. For a lot less (around 300 Euros) you can find a Revox A77, its predecessor, which uses a lot of similar components and still sounds great. The key thing to consider is what speeds your machine functions in: 3¾ , 7.5, or 15 IPS. IPS stands for “inches per second”, and therefore the faster it is going, the higher fidelity your recording will be. (I recorded at 15IPS). And another thing… watch out that you don’t buy one of these models in a 4-track version, these models were made mainly for consumers so you could record on two sides of the tape, but for higher fidelity recording make sure it is just a 2-track version.
Revox is the consumer brand of Studer, and uses a lot of the same components. There are loads of A77s and B77s around, so it’s easy to find spare parts for them, and easier to find people who know how to repair them. I ended up with a Revox A77 mkII after my Revox B77 had some problems that I couldn’t repair in time to mix the record, and I was very happy with it.
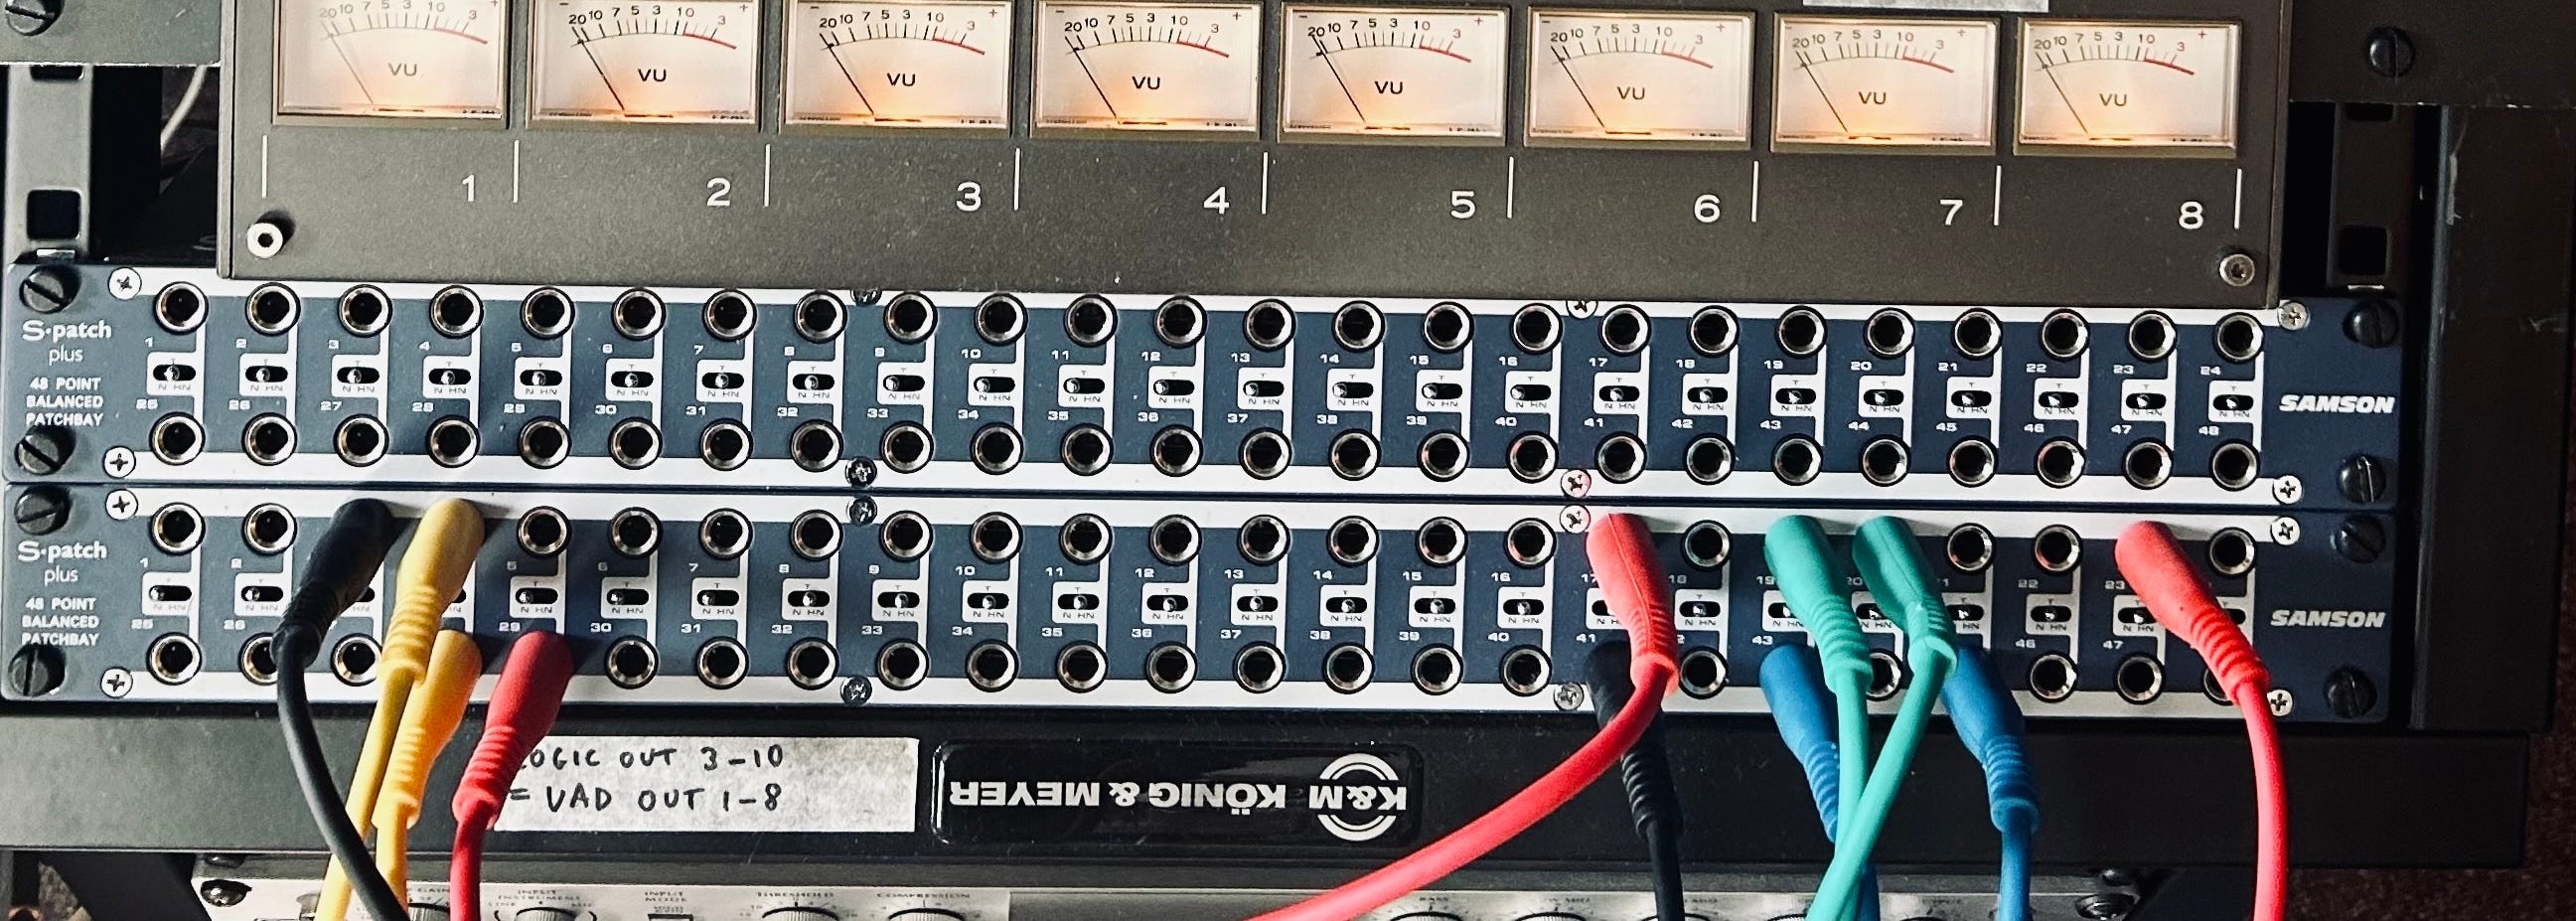
Patch bay(s)
With all the inputs and outputs of an 8-track reel-to-reel, a 12 channel mixer, and the pre-amps / outboard gear I was using, it quickly became clear a patch bay was essential for a smooth work flow. The patch bay enables you to change inputs and outputs all in one place with shorter cables, so you don’t constantly have to reach around the back of your equipment, sending cables to different places. I really like the Samson S Patch+ (about 180 Euros) as you can easily flick a switch on the front whether you want your connecttions to be normalled, half-normalled, or non-normalled (thru). Explanations below:
Normalled: The output on the top jack is internally connected to the input on the bottom jack. When you insert a patch cable into the output (top) jack, it breaks the internal connection and routes the signal through the cable instead.
Half-Normalled: Similar to Normalled but with a key difference: when you plug a patch cable into the output (top) jack, it allows the signal to also continue passing down to the bottom input jack. This lets you split the signal to feed two destinations simultaneously.
Thru (non-normalled): There is no internal connection between top and bottom jacks. You must use patch cables to route signals from outputs to inputs.
Tapes!
A crucial one :) I was given a load of old tapes when I bought my reel-to-reels, but after a few years they all get sticky and leave residue on the tape heads. I’d probably recommend getting new tapes instead of baking old tapes (yes you can bake old tapes in the oven to get them working again), but I only say this as I wasn’t adventurous enough to bake any of my old tapes yet! RTM still makes new reels for around 90 Euros each that are easy to buy here in the Netherlands from shops like Thomann. You’ll need leader tape and splicing tape, and razors, but that’s for another post.
The rest
As for the rest of it, after a versatile microphone (I love the Neumann TLM67, and AKG414 for guitars and vocals) I’d certainly recommend a decent pre-amp, compressor and de-esser. I used an Avalon 737 pre-amp/compressor for most of my vocals and guitars, and for my voice the SPL DeS was essential to take off the sibilance (really natural sound and easy to use). There’s certainly more to get into here, in particular the final step of mastering to vinyl, but as a general overview I hope this is enough for now. If you have any questions let me know and I’ll try and answer them / keep editing this article.